
Basics
How camera settings control light, focus, motion, and image files.
Learn the main settings
Exposure is simply how bright or dark your photo is.
Aperture, shutter speed, and ISO control exposure. They also change focus, motion, and image quality.
Read a section, try the setting on your camera, then compare the photos.
How exposure works
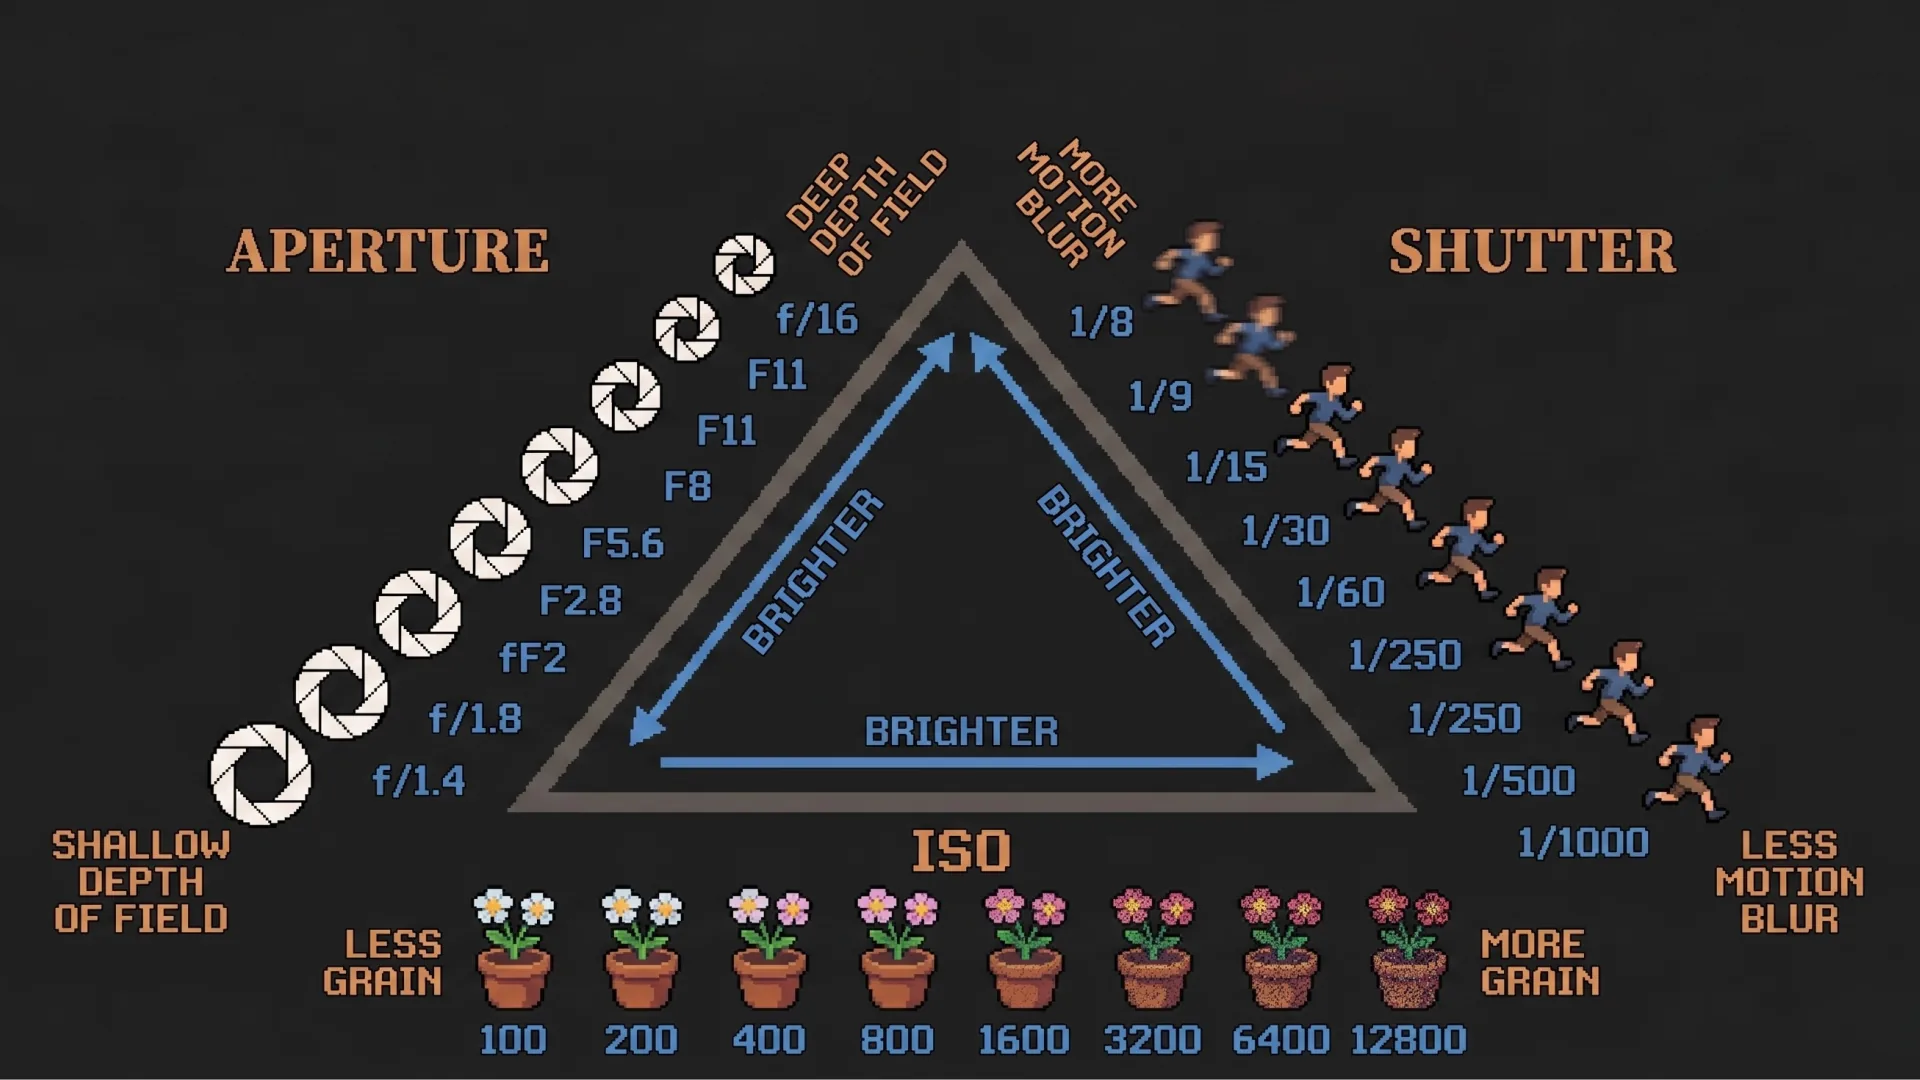
The exposure triangle
Aperture, shutter speed, and ISO all change the photo’s brightness. A phone or camera can set them for you. Learning them lets you choose how the photo looks.
Think of exposure as a balance. If one setting reduces the light, another must add it back to keep the same brightness.
Try the exposure triangle
Compare settings at 0 stops to see focus, motion, and noise.
The noise preview could not load. Reload the page to try again.
Try this: close the aperture one stop, then slow the shutter one stop. The brightness stays the same; focus and motion change.
Aperture
How wide the lens opens
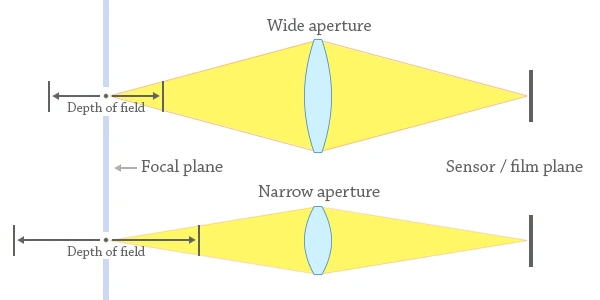
Aperture is the opening inside the lens. It is shown as an f-number, such as f/1.4, f/2.8, f/5.6, or f/11. A smaller number means a wider opening.
A wide opening lets in more light and creates a shallow depth of field. Less of the scene looks sharp, so a portrait can have a blurry background. A narrow opening lets in less light and keeps more of the scene sharp.
More light and more background blur. Useful in low light.
Less light and more of the scene in focus. Useful for landscapes.
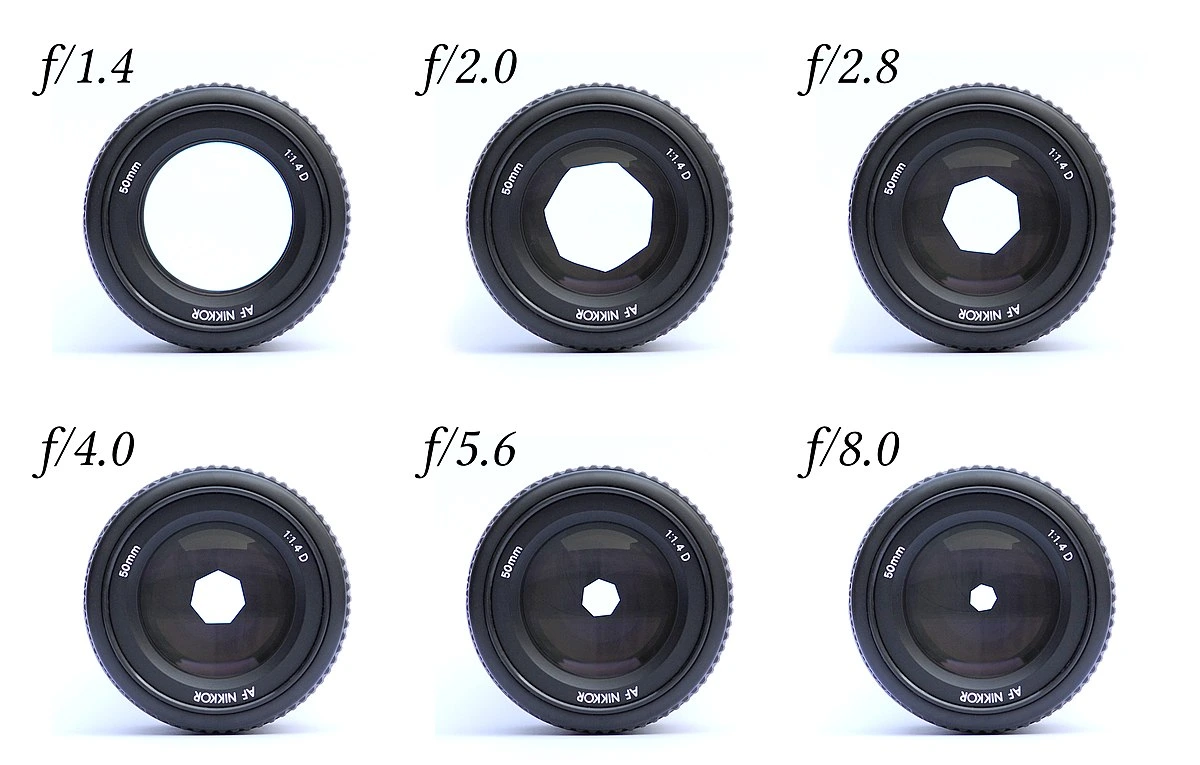
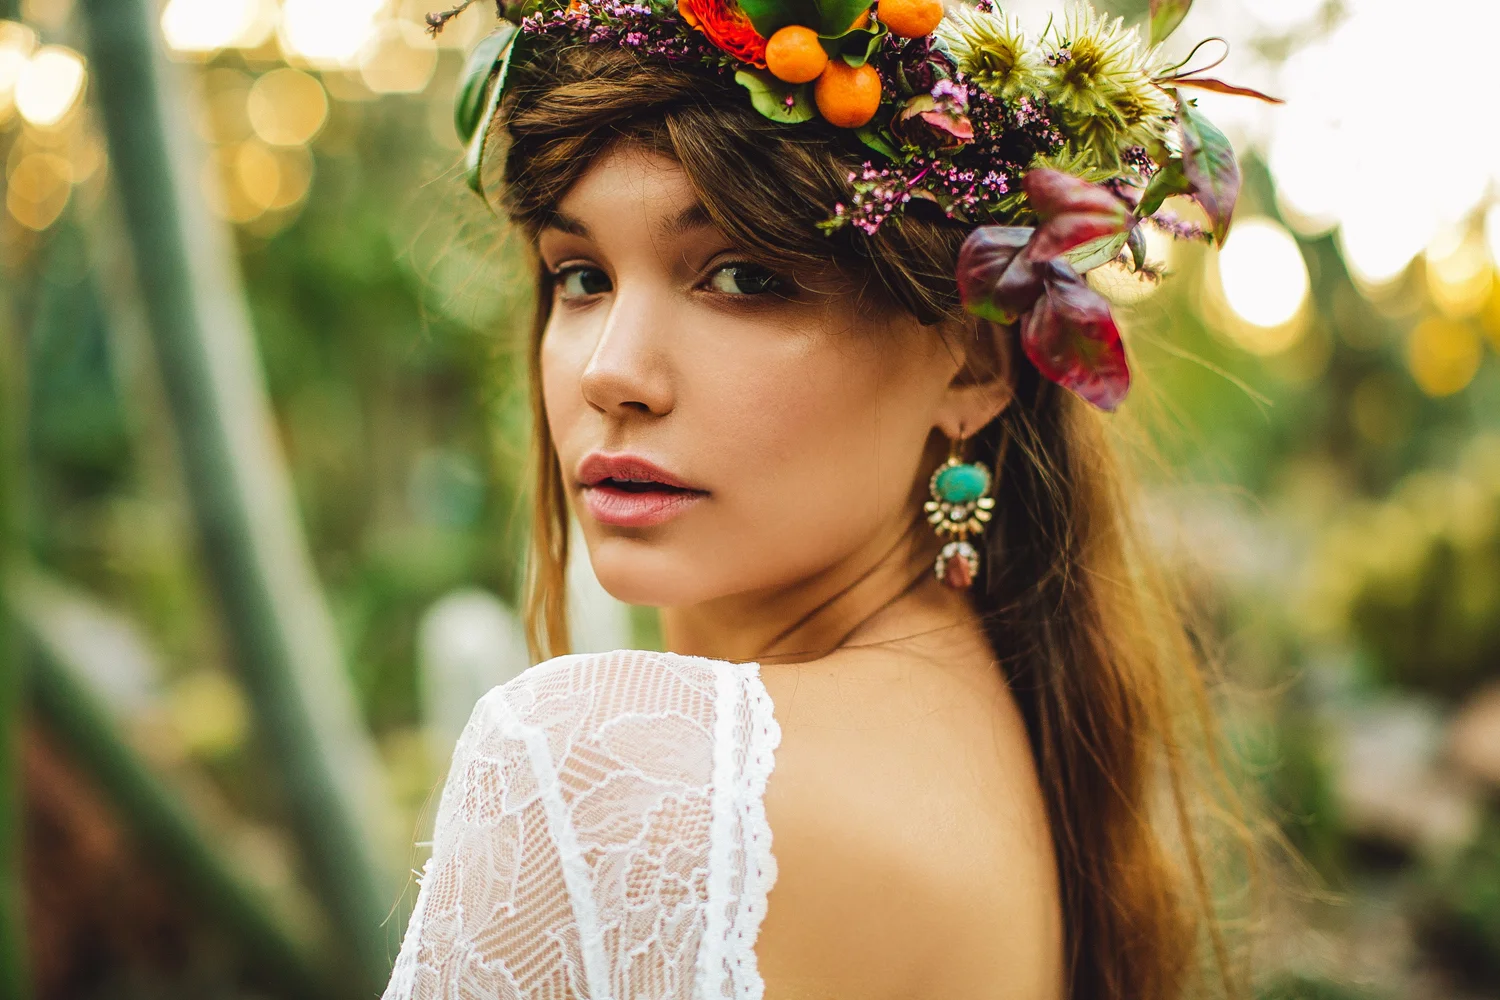
What aperture changes
- Exposure: wider apertures let in more light.
- Depth of field: wider apertures make less of the scene look sharp.
- Lens size and price: very wide apertures often make a lens larger, heavier, and more expensive.
Open the aperture when you need more light or want a blurry background. Close it when more of the scene should look sharp.
Shutter speed
How long the sensor records light
Shutter speed is measured in seconds or fractions of a second. It sets how long the sensor records light. 1/500s lets in twice as much light as 1/1000s because it lasts twice as long.
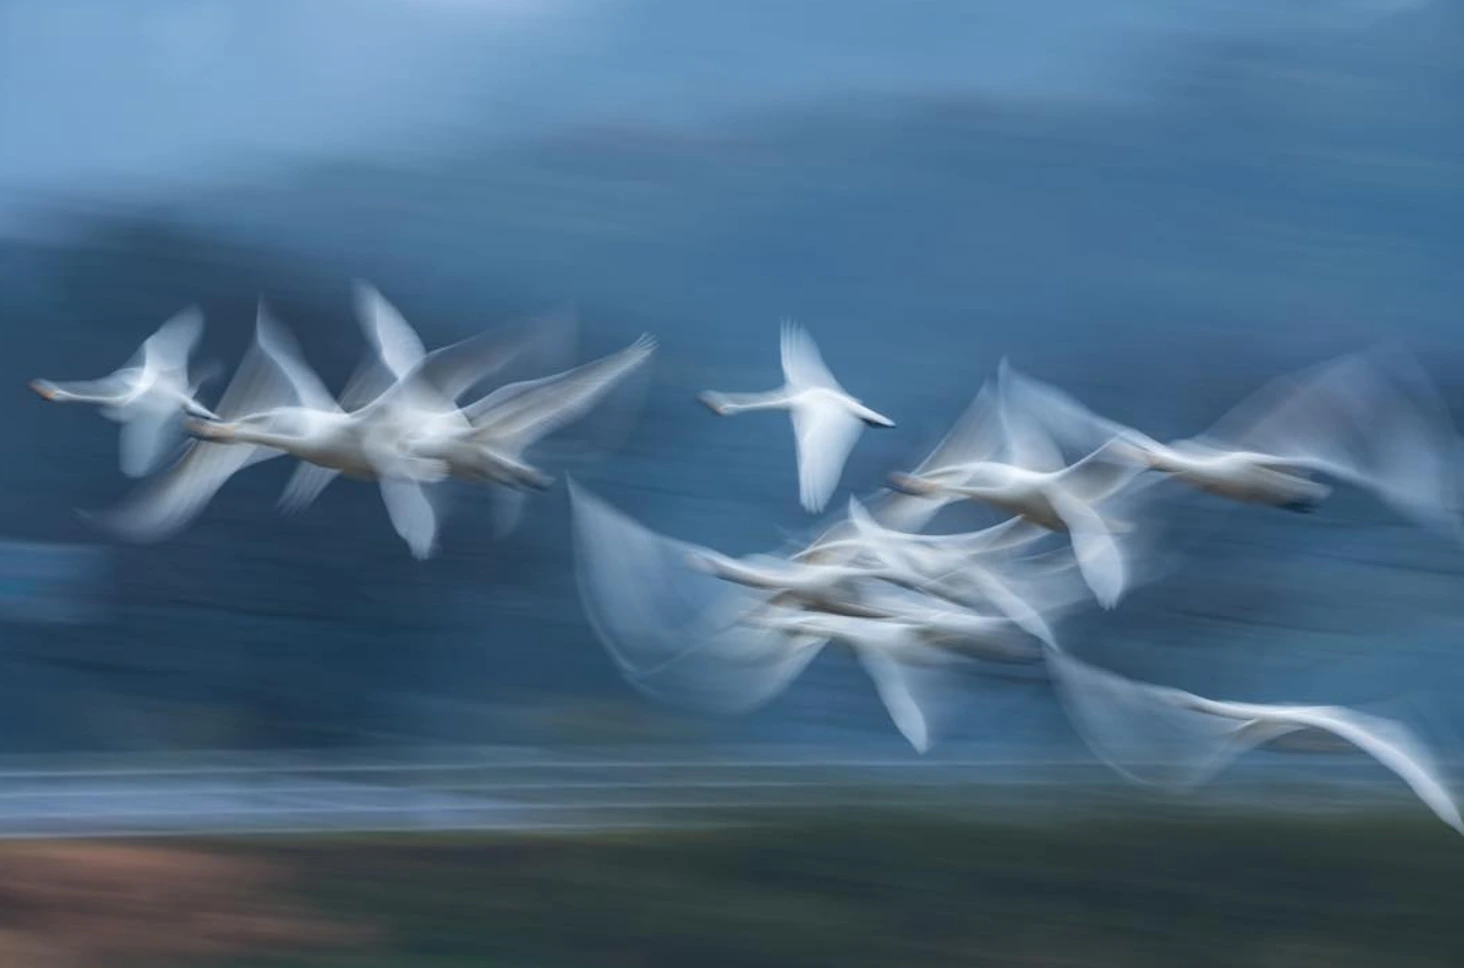
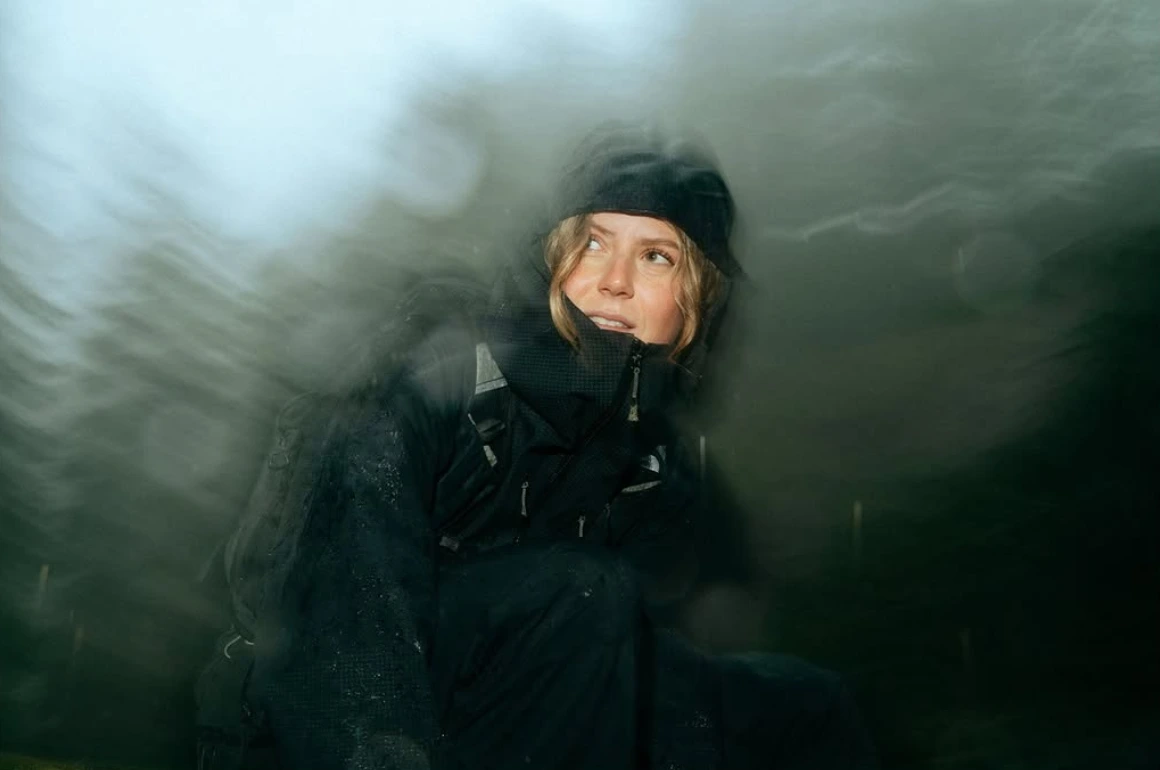
Shutter speed also changes motion. Fast speeds freeze movement. Slow speeds create blur.
Use for sports, wildlife, and other fast action.
Use for motion blur, moving water, and light trails.
Use blur on purpose
Blur can show movement
A photo does not always need to be sharp. Try a slower shutter speed at a concert, on the street, or near moving water. Compare the shapes and streaks it creates.
ISO
Brightening the sensor signal
ISO comes from film speed. On a digital camera, it works like gain: the camera amplifies the sensor signal to make the image brighter.
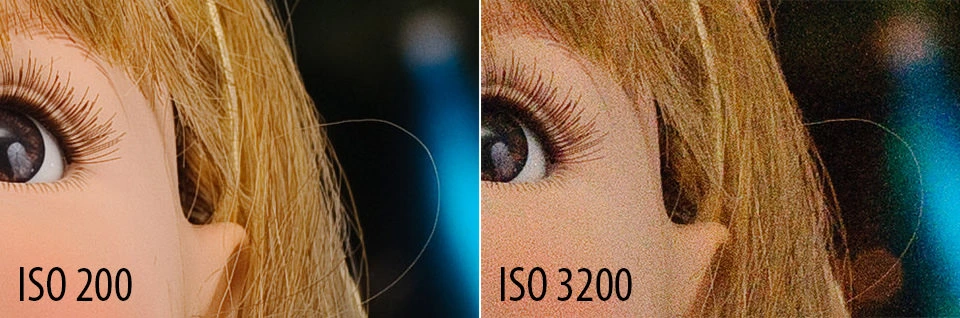
Raise ISO when you cannot open the aperture or slow the shutter. Higher ISO adds noise, especially in dark areas.
Best when you already have enough light.
Use it when getting the photo matters more than avoiding noise.
Dynamic range and noise
Keeping detail in bright and dark areas
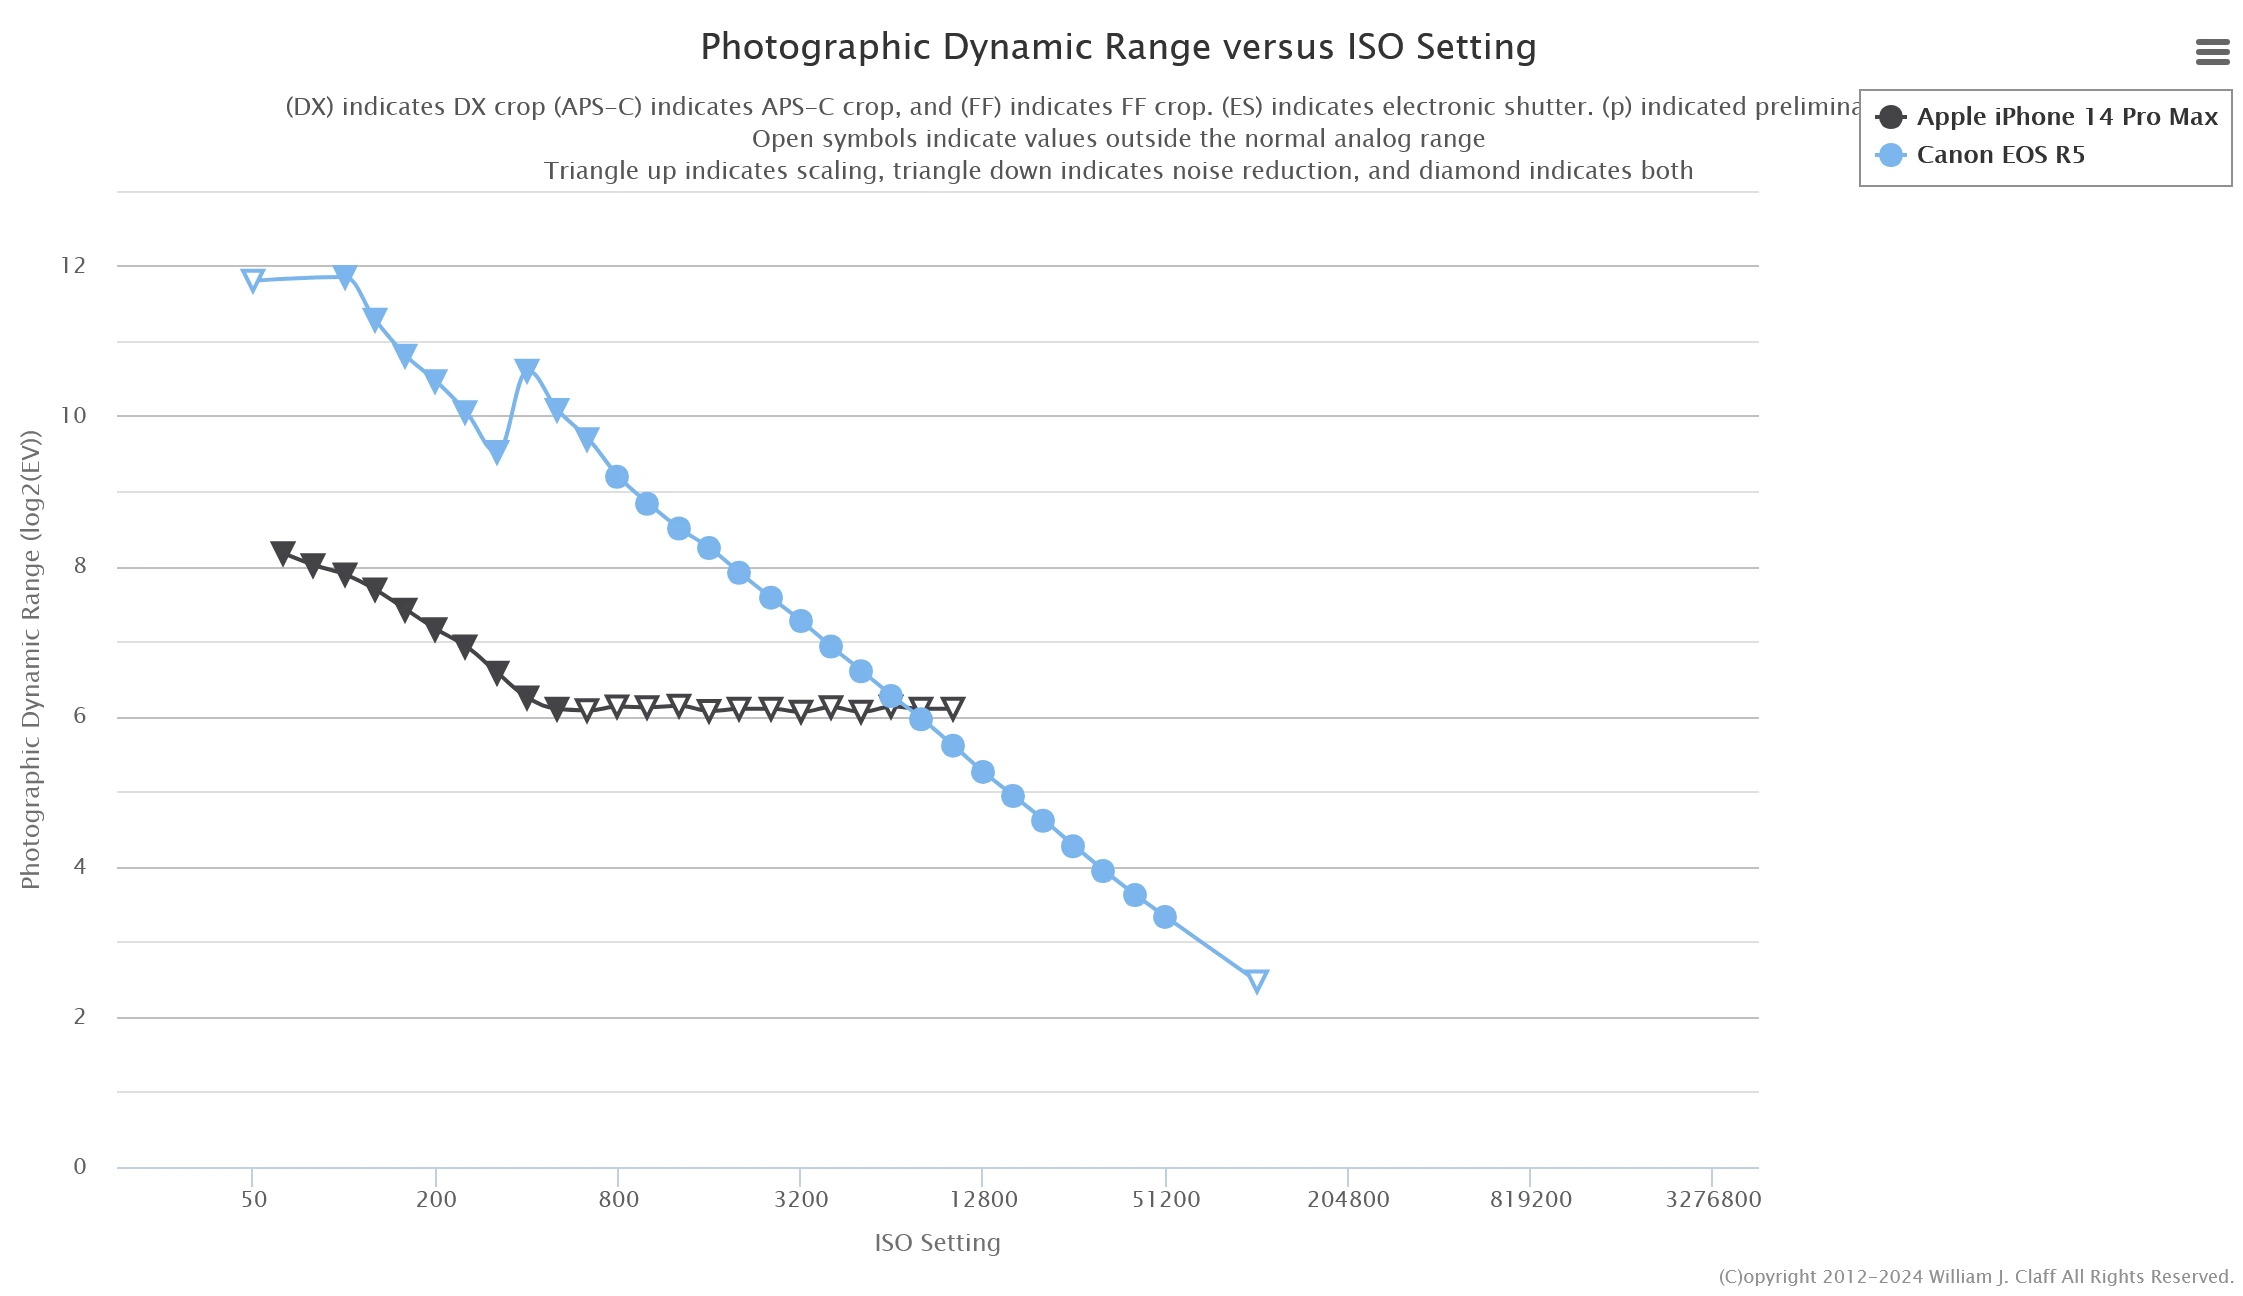
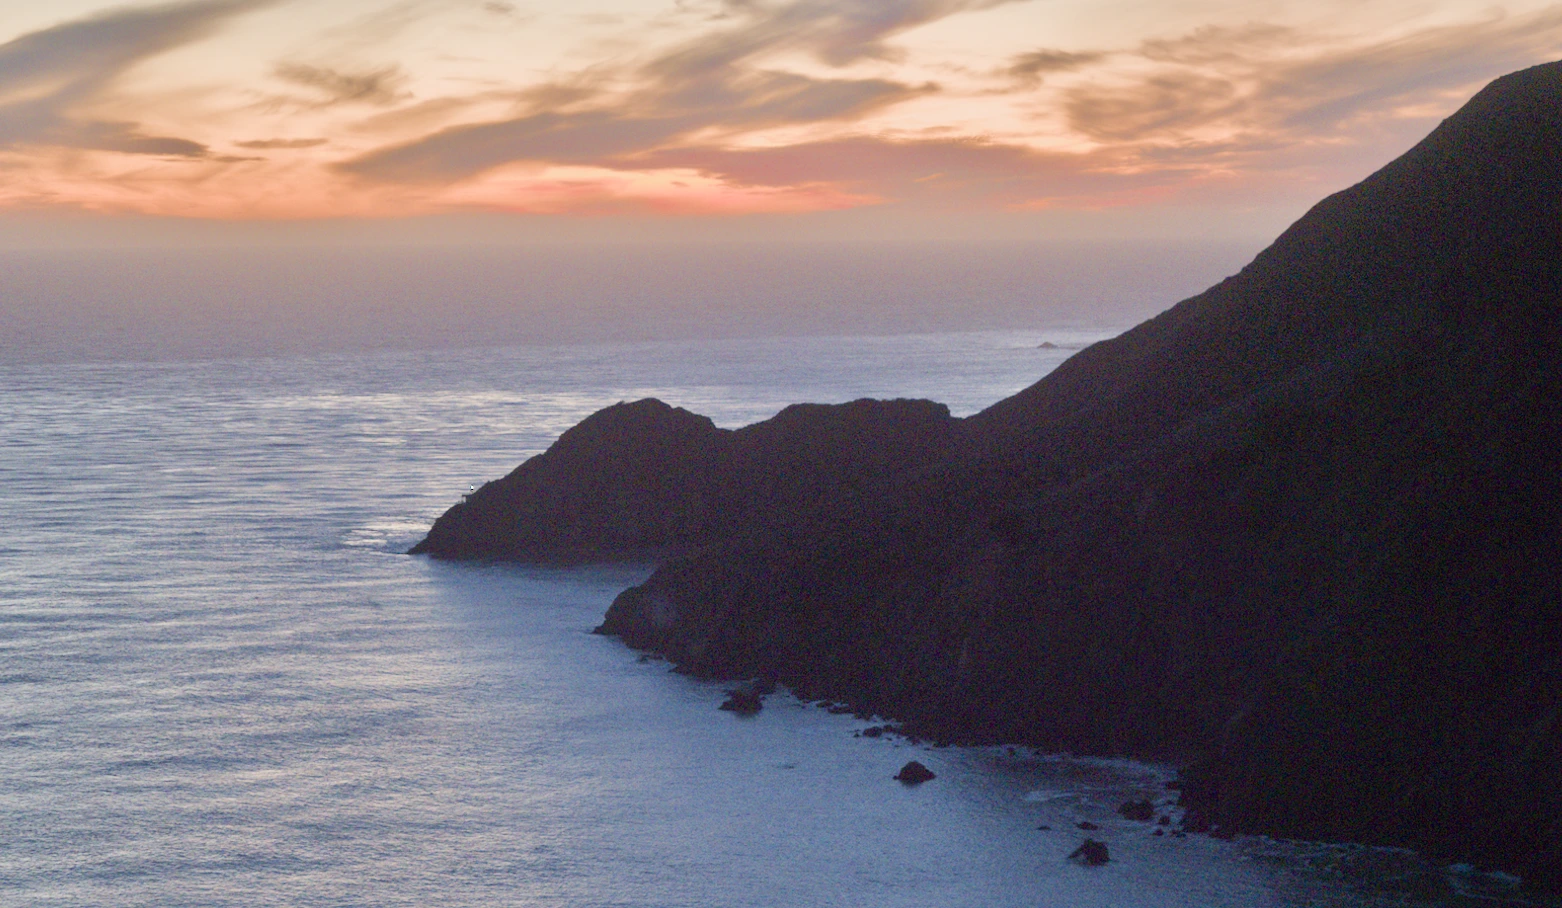
Dynamic range is the range from dark to bright that a camera can record before it loses detail. It is measured in stops. More dynamic range gives you more room to recover shadows and highlights while editing.
Dedicated cameras often handle difficult light better than phones. Phones narrow the gap with larger sensors and computational processing.
Most cameras can save JPEG, Raw, or both. You can change this in the image-quality settings.
JPG, PNG, and HEIF files are already processed. JPEG uses lossy compression and keeps the finished look made by the camera. Raw files keep more sensor data. This gives you more room to change exposure, shadows, highlights, and color in Lightroom or another editor. Supported iPhones can also shoot Apple ProRAW.
Raw files are larger and may look flat before editing because they skip much of the camera’s JPEG processing. Choose Raw when you want more editing room. Choose JPEG when you want smaller files that already look finished. You can still edit a JPEG.
Raw cannot save every scene. In very harsh light, decide whether the highlights or shadows matter most. For a longer explanation, watch Raw vs. JPEG.
Balance the settings
Different settings can make the same exposure
Suppose a photo has the right brightness at f/2.8, 1/1000s, and ISO 200. These settings keep the same brightness but change the result:
Wide aperture, fast shutter, and low ISO.
One stop less light from the aperture and one stop more from the shutter.
More of the scene is sharp, but the higher ISO adds noise.
Aperture changes depth of field. Shutter speed changes motion. ISO helps reach the needed brightness after you choose the other two.
Camera modes
You do not need manual mode
Many cameras have P, A, S, and M on the mode dial. They mean Program, Aperture Priority, Shutter Priority, and Manual. Each mode changes which settings you choose and which ones the camera sets.
Start with Aperture Priority and Auto ISO. You choose the aperture. The camera sets shutter speed and ISO within your limits.
| Mode | You set | Camera sets |
|---|---|---|
| Program | Exposure compensation | Aperture and shutter speed |
| Aperture Priority | Aperture | Shutter speed |
| Shutter Priority | Shutter speed | Aperture |
| Manual | Aperture and shutter speed | Nothing, unless Auto ISO is enabled |
Use the settings that help and ignore the rest for now. Next, read Anatomy of a Camera to learn the main parts and controls.